Thursday, February 14, 2008

HOWTO: Mac OSX on a Windows Machine


For this you will need a mac (or a hackintosh) running OSX. This is basically a way to connect multiple users simultaneously to the mac system, a la XDMCP for Linux. The performance isn't quite as good as XDMCP since it uses the VNC protocol, but it is very much usable over a LAN.

All these steps are to be done on the Mac..
Step 1: Create a secondary account. This will be the account you log in to.

Step 2: In the account section in the System Prefrences, open up the Account section, and browse to 'Login Options'. Open this up and enable 'Fast User Switching'
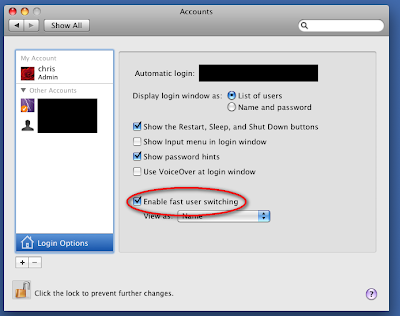

Step 3: Switch to the account you want to be able to connect to via fast user switching. This is accomplished by clicking the user name in the upper right corner and selecting the name you created in step 1.

Note (Thanks John): You need to disable the built-in Leopard screensharing via the Sharing option in System Preferences before installing and using Vine if you have it enabled (It is off by default)

Step 4: Download and install Vine (This is a standalone vnc server. Use this instead of the inbuilt VNC server.) from HERE - You will want to get the 3.0 package.

Step 5: Run the vine server, and set it to open at login by right clicking the icon on the dock, and enabling 'Open at Login'

Step 6: Switch back to your original account

Step 7: Download a vnc client for windows, and connect to the IP address of your mac. If everything went according to plan, you should have your mac desktop sitting on your windows desktop.

A few notes:
You should be able to adjust the screen resolution of the other user without a problem, although there are reports that it can do some odd things to the resolution of the primary user. Basically what happens is this - If you switch on the mac to the secondary user, the display resolution gets overwritten to the default, and you need to change it back with vnc.

Also, if you reboot, you will have to re-login to the secondary account in order to be able to connect.

And hey, if you found this helpful, please leave a comment and click my google ad.

Update: A commenter (John) has recommended that on the windows client, you set the encoder to zlibHex and the compression to 1 for best performance.

Sunday, February 10, 2008

HOWTO: XDMCP with Windows XP

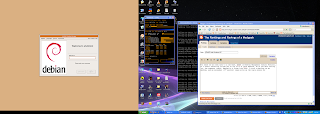
For those of you that aren't in the know, XDMCP (X Desktop Management Control Protocol, if I recall correctly) allows you to log in to a linux machine, as if you were sitting -at- the computer itself. Basically it works like this, I click a shortcut on my desktop, and my secondary (17" monitor) comes alive as the login screen for my linux machine. Yay right?


(Note the KDE on the left, and the XP on the right?)

It's fairly easy to set up. If you are using Gnome (and I'd recommend it for setting this up, as KDE seems to be harder (IE: You need to edit text files, and there are a billion HOWTOS out there for it)), you go to System->Administration-Login Window. Click the remote tab, and choose Style: Plain. THIS IS IMPORTANT. THERE IS A BUG WITH THE CURRENT GNOME VERSION THAT WILL REFUSE CONNECTIONS IF THIS IS NOT PLAIN.

Most of the other options can be left at default. From your windows machine:

Download xming. Yes, you can use cygwin, but it's harder to set up and is only really needed if you want a hell of a lot more linux stuff then you need for this app. Xming is basically a little xserver with a nifty app to let you connect via xdmcp.

Once you get xming set up, open up the xlaunch dialog. Now, for xdmcp you will want to choose One window, or one window without border. If you want the linux window to take up your entire monitor (this is the closest to physically being at the linux machine), you'd choose fullscreen.

Click next, click XDMCP, type your hostname, click next. Under addition options for xming, you can set things like the size of the window, or what monitor it appears on:
-screen 0 @2 -> This will put it on your second monitor, taking up the whole screen
-screen 0 1024 768 -> this will make a window that is 1024x768 (ignored if fullscreen is picked earlier)

After you finish that, you have the option to save it, and the button for finish. Clicking finish will start the connection, hopefully giving you this:
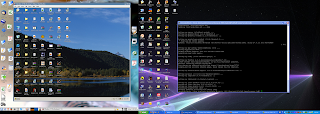
Log in as normal, and viola! Then, you can get really geeky and do something like this!

Yes, I'm running XP, which is connected to Ubuntu 7.10, which is running a Virtual Machine of XP.

And hey, if you found this helpful - by all means leave a comment.

Search.

Google